Dear Readers: HWS has recently started a new project for the students of engineering ====> The Engineering Projects


Write at HWS !!!

Guest Posting

How secure is your Computer ?

Check out your computer safety here . A lot of tools , tricks and hacks related to computer .

Blogger Tips and Tricks

A Lot of tips ,tricks and hacks related to blogger . Seo tricks to get maximum targetted traffic to your blog.

Easy ways to Earn Online

Online earning is not so difficult but it needs a lot of patience and hardwork. Here are some techniques to earn money through internet.

Facebook Tricks

A lot of facebook tips , tricks and hacks.It requires a lot of time but reading is must.

Pro Hacking

If you have knowledge about basic techniques then try this,but be careful as it is highly toxic.

Wednesday, September 28, 2011

Chapter 4 : Widgets and Add-ons essential for blogger

Hello guys hope you all are fine and enjoying good health , Sorry for the delay of this chapter actually I was very busy in job and also in my hostel allotment as I have told about it on facebook . Well now I get time to write this chapter. In the previous chapters . In the previous chapters I have told you how to Setup a new Blog and also about How to choose an attractive template for blogger and in the recent chapter we learnt about How to Make Your Blog Post Attractive . Now in this chapter I will told you about the Widgets and adddons that are essential for the bloggers . I will try to tell you guys all the widgets I am using but still if you want to add any other widget and want to know how to add that widget then can ask in the comments.

List of Widgets


Following are the few widgets which I am using and I will recommend all the bloggers to use them as they are best for blogs :

Multi Tab Widget


Add Banner Widget


  • This one is also a great widget . I am not using it rite now but will use it in future.


  • I will recommned you to use it when you have enough traffic and other sites are find you worth enough to add their sites.


  • Its also a good source of earning for you.


  • Add 125 by 125 Add Banner to your blog .


Email Subscription form


  • Email Subscription is the most essential tool for bloggers because its a constant source of earning for you.


  • As much email subscribers you have ,so the traffic to your blog will increase .


  • So add a cool subscription form to your blog and it must be easily visible so that visitors can add their emails very easily.


  • Add a subsription option under each post which I have explained in previous post and also add a widget on your sidebar.


  • Add a cool Subsription form to your sidebar and enjoy the traffic .


Feed Subscription Form


  • This is also an other way to increase your traffic and the best way to attract other visitors.


  • If you have 500+ feed subscribers,it means you are doig a fabolous job.


  • Others sites ads cost also depends on it . When someone is willing to pay you for their ads then he must first check your feed subscribers.


  • Add a cool feed Icon to your Blog and enjoy traffic.


Add a Footer Column


  • As I have explained in my previous chapter that adding footer is very essential for the blog .


  • It increases the beeauty of your blog and also you can add many addons in it .


  • First try to get a template having footer but you have some blog without footer then herez the way to add a Customized Three Column Footer widget to your Blog .


Recent Post and Recent Column


Bookmarking Sites Widget


  • If you find some beautiful Bookmarking widgets then must add them to your blog.


  • Its a good way to get backlinks from these sites and also a lot of traffic.


  • I have posted about Twitter Recent Post Widget for Bloggers .


  • If you want to add any other widget and need help then ask in the comments .


Enough for today , hope I have helped you guys in some ways and I am waiting for the response about howz your blog looks after adding these widgets .... :))


A25UBXF9XS7W

Shift Sidebar Widgets to Right or Left


SHIFT SIDEBARS
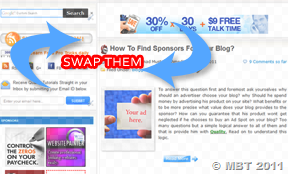
This is just a short but extremely useful trick for all those who wish to change the position of their Post body and Sidebar wrapper. Normally most professional layouts have sidebar arranged to the left but E-commerce blogs or other business blogs look good with left sidebar column. In order to keep your blog layout according to standard rules then you may like changing the position of vertical dv segments in your template. If you want to shift your sidebar to left or right or swap sidebar and post body position then you can easily do this using the simple setup guide below.


Shift sidebar Position In Blogger

  1. Go To Blogger > Design > Edit HTML
  2. Backup your template
  3. Search for this code or a similar code like this,
#main-wrapper { float: left; width: 600px; margin: 0; padding: 0 0 20px; }

Replace float: left;  with float: right;
You have now successfully shifted your post body to right now you need to shift your sidebar column. Search for this,

#sidebar-wrapper { float: right; width: 320px; margin: 0; padding: 0 0 10px; display: inline; }

Replace float:right; with float: left;
You have successfully shifted your sidebar wrapper. View your blogs to see a magic change.  HAVE FUN! :)

Thursday, September 15, 2011

Free Essential Tools for Blogger Blogs

Which are the best Blogger tools? Blogger has a simple and fine interface that takes care of many things for you. This is my suggestion to you for your first free essential must haves for your blog.
Free Blogger tools


  • Feedburner - It generates an smart feed compatible with all feed readers for free like my feed. It allows you to put easy subscribe buttons for XML, Add to yahoo, Add to Newsgator, Add to MSN etc. Read about how their single feed policy can benefit you.
    It can give you a cool feed count chicklet button to show how many readers are using your feed to read your blog. It also gives you a headline animator which you can attach to your blog to display the recent 5 posts in a nice animated fashion. You can get an authentic Creative Common license, get a browser friendly RSS feed, Splice photos and links and more…

  • Haloscan – Trackback is an essential component of blogging these days. Unfortunately Blogger does not have trackback. Haloscan provides you with a seamless way to integrate free trackback in your blog by adding a small code. You can also integrate their comments component if you like to replace the Blogger comments. Read about Haloscan or Blogger comments.
    The benefits are that you can edit Haloscan comments, and open them in a pop up and keep them separate from your post (Blogger allows you to only delete comments and not edit them, also on the post page all comments will show whether you like it or not).
    The main disadvantage is it will not email you these comments (like Blogger) for free and it is difficult to track where these comments were made. Another major benefit is that it allows you to send pings and trackback to other sites when you mention about them in your posts.

  • Imageshack – Dont you want to fill your blog with images without hassles of registration. Imageshack provides an excellent interface to take care of your free image hosting needs. Maybe it is this the fastest way to host an image on the web. Allows lots of image format, hotlinking, transloading from other sites. Its a good idea to register to keep track of all your images in one place. It is much convenient than the proposed Hello and Picassa options… [Update: Blogger enabled hosting of images on its own webspace making it easier to host images in your posts. But you cannot manage or edit / delete your blogger images in any way

  • Technorati - Create and add a technorati profile. It allows you to claim your blog in this huge blogosphere. It allows you to put an excellent technorati search on your blog. The best part is that whenever someone mentions or links to any page of your blog, technorati knows and a search for your blog on technorati shows exactly how many sites link to which pages of your blog and when they were added with a small description. See why you need a technorati account.

  • Sitemeter – Just takes 5 minutes to get a free tracker which gives you realtime site traffic statistics to check the quantity and quality of your site traffic with detailed referrer and geographic data. I have checked out several other tracking sites, but this one seems the best. Although you need to keep a counter visible (as a logo, visitor counter) and the statistics can be made private too.
    StatCounter gives much more detailed statistics and the counter is totally invisible and free totally till you start getting large traffic, when you need to pay. But the disadvantage is that both of these track the last 100 visitors only, while another free service Extreme Tracking tracks them all… but you statistics cannot be made private. More options I like are Google Analytics for deep traffic statistical analysis and it is hidden too.

  • Feedblitz – It quickly allows your blog visitors to subscribe by email to your new posts. They just have to enter their email. You decide which page opens after they press Subscribe. A quick confirmatory email to them and they get 1 email daily with all your new posts. You can decide if you want to send the full post or short posts with defined number of characters. Very good to keep your subscribers informed of new posts. It allows them to unsubscribe easily also. Example for our blog.

  • w.bloggar – It is a Post and Template editor, with several features and resources that the browser based blog editors do not offer. It enables users to have only one interface to several accounts hosted on several different sites, using different publishing systems. Helps to manage multiple blogs on Blogger very effectively.

  • Blogger Mobile – opens a new concept of Moblogging i.e. blogging by your mobile phone. When you send text or photos from your mobile device to go@blogger.com they’re automatically posted to your new blog page.

  • Blogexplosion – helps you get confirmed traffic to your blog. The principle is simple, you visit other peoples blogs and they visit yours. For every 2 blogs you visit, one visitor comes to you. This is very good if you are new blogger and have hardly any traffic. Definitely try the Rent a Blog advertising swap service.

  • Pingoat – Pinging lets dozens of blogging services know you’ve updated your site and increases traffic to your blog. Just enter your blog name and blog home page, check the blogging services you want to ping, just click ‘Submit Pings’ and in one click it pings all of them. Pingoat offers a wide variety of such services and is fast too. See many more one click pinging services.

  • Creative Commons – It offers a flexible range of protections and freedoms for authors and artists. They have built upon the “all rights reserved” of traditional copyright to create a voluntary “some rights reserved” copyright. They are nonprofit and all tools are free and useful to highlight the way in which you want others to use you content.

  • Google Adsense and Search – When you take all effort to write for a blog, why not optimize it to make some money. Let users search for good posts in your blog. And now it even helps to monetize you feeds.

8REKFFNFN6F2

Sunday, September 11, 2011

Chapter 3: Make your Blog Post Attractive

Hello guys hope you all are fine and enjoying good health. In our previous chapter ,we learned How to set up a new blog and also How to choose an attractive template for blogger. Now we are perfect with our blog's external body ( we will discuss widgets latter ) , now we come towards the posts of the blog . Now you are in a position to start posting on your blog. While posting on your blog keep these things in your mind :

Important Points for Writing Posts


Read all these points carefully and if you got any problem simply ask in comments. I have tried my best to make them simple .

1) Be unique in your postings


  • Never used a copy material , always try to post your own material.
  • If you find some article intresting and you want to post it on your blog then before posting edit it .Like you have seen my posts ,I have my own writing style and you can judge it very easily.
  • Before starting a post use some greetings and make your attitude like you are well known to the reader as you can in this chapter I have written a greeting just check the start of this chapter. It makes the reader to feel the blog is genuine and the material on it is not just copy paste. Hope you guys getting my point.

2) Style of  Post Body


  • Make the style of your post unique like there is just one font and color for your blog headings .All your headings must be of same style,font and color.As you can see in this blog I am using sky blue color for all my headings with upper and lower dotted lines.Customize your Heading Style in Blogger and Wordpress.
  • Similarly ,if you want to post any link in your post then choose a color for it too, like if you see in this blog I am using the same color for my links.
  • These two things bring a regularity in your post and attracts the visitor most.
  • Make the bullets unique as you can see all my bullets are two arrows,it increases the attractiveness of your post and again the colour of bullets must be the same as your heeding color or link color. Customize Bullet List Style In Blogger With Image Hover
  • If you want to add some html coding in your posts then again give it a style.Will post about it if anyone asks about it as its not so difficult .
 Thats all for this section ,having any problem you can ask in the comments.

3) Bookmarking Icons in the Post


  • Must add bookmarking buttons on your posts as it helps in promotion of your post. but on the same side dont add huge number of icons it makes everything messy.
  • Just add them on the top and at the bottom of your posts and try to give them an attractive style like hover up etc.
  • Must add a subscription option at the end of post as it increases the visitor. More the members subscribe to your blog more will be the visitors.
Thanks guys for reading this. I tried my best to make it as simple as i can and still if you guys having any problem then ask in the comments and also +1 this post to return me some favor for my efforts :))

Customize your Heading Style in Blogger and Wordpress

Change-heading-style You must have observed the style of headings in my posts, it’s usually surrounded by two sky blue borders and have a text colour in sky blue. Styling the Headings gives an interesting and attractive look to your blog content. Readers find it more easy to locate a certain portion of your topic with the help of properly customized Headings. Further it will increase your search engine ranking because heading tags produces a really good impression on search engine robots. This tutorial is mainly for Blogspot users but some interesting styling can surely be added to Wordpress. Lets Start!


Customizing Heading Style Using Simple CSS – For Blogspot Users

I have six different Heading styles for you guys. Have a look at the video below,
Now to add one of the above Heading Style to your blogs, do the following,
  1. Go To Blogger > Layout > Edit HTML
  2. Search For ]]></b:skin>                  (Tip:- Press Ctrl + F )
  3. Just above ]]></b:skin> paste one of the codes below,
  • For Heading Style with a bottom border, use this code,
.post h4{
color:#0080ff;
border-bottom:1px solid #289728;
font-size: 12pt;
padding:2px;
}
  • For Heading Style with a border at top and bottom, use this code,
.post h4{
color:#0080ff;
border-top:1px solid #289728;
border-bottom:1px solid #289728;
font-size: 12pt;
padding:3px;
}
  • For Heading Style surrounded by borders, use this code,
.post h4{
color:#0080ff;
border:1px solid #289728;
font-size: 12pt;
padding:2px;
}
  • For Heading Style with Hover Effect, use this code,
.post h4{
color:#0080ff;
border-top:1px dotted #289728;
border-bottom:1px dotted #289728;
font-size: 12pt;
}
.post h4:hover{
border-top:1px dotted #0080ff;
border-bottom:1px dotted #0080ff;
background-color: #289728;
color:#fff;
}
  • For Heading Style surrounded by a Box, use this code,
.post h4 {
border-bottom: 1px solid #289728;
color:#0080ff;
font-size:12pt;
}
.post h4 span {
position: relative;
left: -0.3em;
bottom: -0.6em;
padding: 1px 0.5em;
margin: 0;
border: 1px solid #289728;
background-color: #fff;
}
  • For Heading Style with a side Image & Hover Effect, use this code,
.post h4 {
background: #fff url(URL OF Side Image) top left repeat-y;
font-size: 12pt; 
color: #0090ff;
padding:28px 0 0 44px ;
}
.post h4:hover {
color: #289728;
}
Make Sure you replace URL OF Side Image with Image Link of your preferred side image. This image can be 45px by 45px in size or even smaller. I have used the following image in the video above –>
    
        4.     Now Finally save your template.

Customization and Implementation Of The CSS Code For Headings

Customization:-
All the CSS codes above use simple properties which are described below,
1.   For Changing border width, style and colour edit codes like this one,


border:1px solid #0080ff
 

Here 1px refers to border thickness/width and solid refers to border style and the six digit number refers to border colour. You can change border style from solid to dotted or dashed. I like border style to be dotted because it gives a light appearance.
You can use our CSS Colour Chart for getting the six digit number for your desired colour
 

2.    For Changing Font Size, edit codes like this one,
font-size:12pt 
If you want the text size to increase or decrease than respectively increase or decrease this value 12pt
 

3.    To Change Font Colour, edit similar codes like this one,
color:#0080ff
You can use our CSS Colour Chart for getting the six digit number for your desired colour  


Implementation:-
 

Now Whenever you write a heading in your post inside blogger editor, simply add the following pieces of codes next to your heading,

<h4> Your Heading Goes Here </h4>
See a screen shot below,
example-image-for-heading-style
This can be done both in compose or HTML mode.
For Heading Style Surrounded By a Box you will need to add slightly different code as shown below,
<h4><span> Your Heading Goes Here </span></h4>
We only need to add an extra span tag (i.e:- <span>) for the box to appear.
That’s All!
Note:- Changes Will Not Appear inside Blogger Editor or on previewing. You will only see a bolded black text inside blogger editor. The styling will take effect only when the post is published.

Customizing Heading Style Using Simple CSS – For Wordpress Users

To be honest I really hate wordpress because it has nothing interesting for new web designers like me. It uses complex php script that few understands and also has a complex CSS editing option that has never went through my throat. If you are an expert wordpress user then you can use the blogspot method above to style headings in your wordpress template but if you find it difficult to edit wordpress style sheet like me then you can adopt a simple way as described below.
We can only apply three out of six Heading style methods to wordpress which are,
  1. Heading Style with a bottom border
  2. Heading Style with a bottom border and top border
  3. Heading Style surrounded by borders
To apply any of the heading style above, do this in your Wordpress Editor,
  1. In the visual mode of your Wordpress editor first write a heading
  2. Now switch to the HTML mode and enclose your heading with the following code,
  • For Heading style with a bottom border, use this code,
<h4><div style="color:#0080ff; border-bottom:1px solid #289728;
font-size: 12pt; padding:2px;">Your Heading Goes Here</div></h4>
  • For Heading style with a bottom border and top, use this code,
<h4><div style="color:#0080ff; border-top:1px solid #289728;
border-bottom:1px solid #289728; font-size: 12pt; padding:3px;">Your Heading Goes Here</div></h4>
  • For Heading style surrounded by borders, use this code,
<h4><div style="color:#0080ff; border:1px solid #289728; font-size: 12pt; padding:2px;">Your Heading Goes Here</div></h4>
The green text is where your heading must lie and the bolded black text is the code that should surround your heading. Now once you have added the codes correctly, simply switch to the visual mode and you will see the heading style in action! See some screen shots below for heading style surrounded by borders,
First enclose your heading with html codes above in the html mode,
wordpress-editor---html-mod

Then press the visual button to see the effect live!
wordpress-editor--visual-mo
To customize the styles read the customization guide for blogspot users
Hope it was clear :>>

Hack Tagged.com password with fake login page

One of my blog users had requested me for a Tagged.com fake login page,It is quite difficult than Facebook fake login page OR Orkut fake login page,but i will make this tutorial easy to understand by post step by step method to create a tagged.com fake page and hack Tagged.com passwords.

Procedure


  • Download Tagged Fake Login Page 
  • First of all extract the files that you downloaded 
  • You will see three files in it : Login.php,Tagged.htm,LoginFrame.htm,LoginFrame2.htm 
  • Now "Right Click" on LoginFrame2.htm and click on "Edit" or else Right Click > Open With > Notepad. 
  • Then you will find something like this: There has been a temporary error Please Your Redirection URL (tagged.com)" target="_blank">Try Again 
  • So,now your main objective is to upload the files into a free file hosting server like www.110mb.com , www.t35.com,www.ripway.com 
  • So just create an account in any of the above sites (i prefer 110mb.com because it is much easier) 
  • Now just get into your file manager

Friday, September 9, 2011

Customize Bullet List Style In Blogger With Image Hover

Animated-Bullet-List

I was going to write the chapter 3 about blogging but you need to learn this thing as we are gonna use it in that chapter. So today we will learn how to change the bullet list using the Image Hover effect. Hover your cursor over the bullet list below to see the effect.


  • Isn’t the image turning blue from green?
  • Liked it? Now learn it!
This effect is really easy to apply. We only need to apply a simple code to your template. Lets start!
Go To,

  • Blogger > Layout > Edit HTML
  • Search For ]]></b:skin>
  • and just above ]]></b:skin> add the code below,   (Tip:- Press Ctrl + F)

.post ul {list-style:none;
}
.post ul li {
    line-height: 1.4em;
        background: transparent url(http://3.bp.blogspot.com/_7wsQzULWIwo/SuOQQiLH43I/AAAAAAAACH4/FBUdi0H2EEo/s400/265.gif) no-repeat scroll 0px 4px;
    margin: 0.3em 0;
    padding: 0 0 0.8em 20px;
}
.post ul li:hover {
        background: transparent url(http://4.bp.blogspot.com/_7wsQzULWIwo/SuOQQ5UHawI/AAAAAAAACIA/7tgVDjU40qc/s400/261.gif) no-repeat scroll 0px 4px;
}


  • Save your template and you are done!


<style>
ul {list-style:none;
}
ul li {
    line-height: 1.4em;
        background: transparent url(http://3.bp.blogspot.com/_7wsQzULWIwo/SuOQQiLH43I/AAAAAAAACH4/FBUdi0H2EEo/s400/265.gif) no-repeat scroll 0px 4px;
    margin: 0.3em 0;
    padding: 0 0 0.8em 20px;
}
ul li:hover {
        background: transparent url(http://4.bp.blogspot.com/_7wsQzULWIwo/SuOQQ5UHawI/AAAAAAAACIA/7tgVDjU40qc/s400/261.gif) no-repeat scroll 0px 4px;
}
</style>
<ul>                           /*hackwithstyle.blogspot.com*/
<li>This is Sample Text</li>
</ul>

I hope you will like it. Take care :>

Customization

The bullet image can be aligned horizontally with the text by increasing or decreasing the value 4px. You can change the value to 7px or more or less according to your blog alignment requirement.
You can also replace the bullets above with your own. To get a bullet of your own choice download up to 231 seductive bullets by subscribing to this blog.
Note:- Subscribers have already been emailed the Download copy
Once you have selected your preferred bullet simply upload it to blogger and replace the above two links (Green and Blue) with the URLs of your own bullets. To learn how to save images in blogger, read this post –> Create a Backup For Images in Blogger

Play With The Code!

Paste this code in the HTML Editor

Thursday, September 8, 2011

CAIN N ABEL to Hack Lan Network

Hack a Computer Using Cain and Abel a complete hack.


Hey guys ,
after so many days m posting a tutorial on cain n abel. I am not getting any response on Computer Networks tutorial so i decided not to post any tutorial on that. But you may find cain n abel very intersting. Specially if you are in a lan... this is like magic wand, so here we go:

Cain N Abel can be downloaded for free...

Understanding the GUI:

If you open Cain n Abel , you will find it very messy . But if you try to understand , its gonna help very much.
ok first we will look some basic features of Cain n Abel:
i have labeled the icons, refer there.
1> its the open menu to open previous results which you have saved.

2>
This is called start/stop sniffer. This is the tool which you have to use whenever u start cain. when you click on that it will start network sniffer i.e it will scan for alive hosts in your broadcasting network .

3>
This is another crucial thing you gonna use. This is named as Start/stop ARP (or apr) poisoning. ARP stands for Address Resolution Protocol.

4> This is used to add items , here items means IPs of systems , to any window .

How to scan network:


Now we will scan our network for alive hosts .
for that go to label 5 in cain n abel (tab which is named "Sniffer"). then click on label 6 , i.e in lower left pan a tab named "Hosts" . Then finally click on label 2 which is start or stop sniffer button.

now wait for sometime and you will see the results , i.e who is in your network .

___________________________________________________________________

Well this was a basic tutorial for cain n abel. if i get response then i'll post very intersting tricks and techniques ... so plz comment here and
like if you want.

Copyright © 2011. All rights reserved by “stealthbastard” and "xeo hacker"

Wednesday, September 7, 2011

Chapter 13 : What is Tabnabbing ? Hack facebook Using Tabnabbing

Hello Friends, i have posted about  Orkut fake login page and also about Tagged.com fake page , today i will teach you how to hack Facebook account password using Tabnabbing. Tabnabbing is a modern type of phishing method used to hack websites passwords. As we all know normal Phishing attack is easily detectable on Facebook because Facebook has implemented an extra code that validates the previous arriving URL and some basic functions. If it founds that page from which you arrived is a Facebook Phish or fake page, it displays a warning message to user that You have been arrived from fraudulent or fake page. So please change you Facebook account password immediately. So user easily came to know that was made lol by someone and he changes his password again. So overall the hacking attempt is failed.
Ahhaha... The old Phishing methods are for novice users who are just script kiddie's and doesn't ABC of hacking.. As technology is changing, to survive as hacker you also need to change your hacking techniques with time. And key to this is coding and language knowledge.

What is Tabnabbing and what advantage it provides over phishing ?

As i already told friends, tabnabbing is modern phishing technology that hacking experts to hack victims passwords. Tabnabbing is same as Phishing, the only difference between them is Phishing redirects you to particular page while Tabnabbing uses the meta refresh feature of web browsers to refresh the page after particular delay (delay is set by user). Meta refresh is just a meta tag that is used in header part of web pages for sending traffic from a source to destination website after few seconds delay depending upon setting. Since its a meta tag so its only processed but no data in cookies is stored. Here the advantage lies, when Facebook checks for the previous page or source from which we are arriving at Facebook, it founds none as we are dynamically refreshing the page which acts similar like we are opening a Facebook page in new tab. Now Facebook recognizes this as user intentionally opened Facebook and he hasn't arrived there through an script or automatic program. So we tab nabbed Facebook from the back end using the meta refresh tag.

Requirements:

  • Phishing Pages by HackWithStyle
  • Register on my3gb website and upload these to them.
  • Send the link to victim.

How to hack Facebook account password using Tabnabbing:

This technique hardly requires less than 5 minutes to hack the Facebook account password.This is the first version of this hack. I will tell you the improvement in this technique in further tutorials. Follow these Steps
  • Downlaod Phishing Pages by HackWithStyle.
  • Unzip the folder ,these are total four files.
  • Now Register on my3gb website and upload these to them.
  • Now open the index file and send its link to victim.
  • Check the password file to get the password of victim.
The only thing i not included in this tutorial is How to send Phishing emails. You all know the reason for this, we cannot discuss such things directly on internet because that can be misused by newbies and i don't want that anybody should use my tutorials for wrong way. I make videos just to guide you how hackers do the things. My intention is to guide you latest things happening in security field and not to make you a cracker.
So Enjoy the tutorial and learn how tabnabbing is done...

Tuesday, September 6, 2011

Chapter 2 : How to choose an attractive template for blogger

Hello guys , sorry for the late post busy in some personel work.Well in the previous chapter named Setting up a new blog we have learned how to create a new blog but just creating a new blog is not sufficient to get visitor , there are some specific techniques which are very essential for the blogger owner to attract the traffic.The blog should be very attractive so that visitor think that he is on some valueable site. In this chapter we will learn how to change our template and what are the things we should kept in mind while choosing our template . Hope you guys like this chapter so lets start it.


Choosing a Template


First of all search on the web and download some cool template for your blog because the default templates provided by the blogger are very basic and useless. Make your blog as much attractive as you can . Now how to download templates :
  • Go to google and write blogger templates 2011 and you will get a lot of cool blogger templates.
  • Be careful in choosing template for your blog and once choosed then stick with it , changing template again and again makes a very bad impact and your regular readers just go away.

What things should be kept in mind ?


Now the question arises that what things should be kept it mind while choosing template. I have changed my template many times because after some days i found some technical mistake in my blog but now I am fully satisfied and will not change my template again . Some keep these things in mind ehilw choosing your template :
  • The background color of your blog posts must be white . Its a human psychology that he likes bright thing and a bright background compel the visitor to read the post.
  • There are many templates with two columns or three columns and i have also seen few templates with four columns .But I will prefer two column template . .In two column there is more space for the posts and the reader can easily read the post.
  • Choose a template with footer because a cool footer increases your blog attraction.Atleast I think so.
  • This is very important point never ever choose a template having many widgets on its home page . Make your homepage as simple as you can . I have seen many friends blog where on their home page there are lots of bookmarking buttons , tweet bird , floating feedback button etc . Simply avoid them . Again forcing on it try to make your blog as simple as you can.
  • Template must have a drop down menu tab .

How to change template in blogger ?


  • Now once you have choosed your template then save it on your deskyop . Its usually a xml file.
  • Now sign in to your blogger account .
  • Now go to Dashboard > Layout > Edit HTML > Browse
  • Choose saved template from your hard disk and click Upload.
  • This will give you warning for widgets to be deleted.
  • Then you can continue with save template.
  • Your new template is installed , so view your blog and check it.

Last Few Words


So now search on google for an appropriate blogger template while keeping these things in your mind . Moreover if you are unable to find the best template dont worry as in our furthur chapters I will teach you how to add footer etc in your blog if they are not already installed.

  • I have my own collection of templates around 20-30 blogger templates which i like most so if any one of you want to get those templates then simply post your emails below in the comments and I will email those templates to you guys . 
  • One advantage of using those templates is that I can easily resolve your problems as I know all the html coding of those templates .
Note: If you guys have any problem at any point simply ask in the comments ,I will try my best to solve your problem , and also give your feedback about this chapter .

Monday, September 5, 2011

Blogger’s fresh new look

As you may have heard, things are starting to look a little different across many Google products—and today, Blogger is the next product to get a makeover.

It’s been a few years since we made major updates to Blogger’s look and feel, and there’s a lot more to these changes than just shiny new graphics. We’ve rewritten the entire editing and management experience from scratch so it’s faster and more efficient for you—and easier for us to update and improve over time.

Throughout the design process, we conducted user interviews to help identify how to make Blogger even easier and more enjoyable to use. We also watched users try our new interface and made many refinements based on their feedback.

A streamlined blogging experience


Whether you’re on a dashboard or settings page of blogger.com, you can always create or edit posts with just one click at the top of the screen. Additionally, the post editor has been expanded and simplified to give you a larger canvas for drafting and previewing your work.


Monitor and grow your audience at a glance


In the new “Overview” section of your dashboard, you’ll be able to quickly get a pulse for how people are reacting to your blog with a graph of your most recent traffic numbers, comment activity and follower counts. For extra guidance and inspiration, you’ll also find a list of helpful links, a feed of Blogger updates and a showcase of other blogs you may find interesting.

Opt in now

Starting today, we’ll gradually let all bloggers choose to turn on the new UI, so your Blogger experience won’t be updated until you enable it. Over the next few days, keep an eye out for a pop-up announcement on your dashboard with instructions on how to get started, and check out this Blogger Help Center page to learn more about what’s changed.

If you have suggestions or feedback about the new look, click the gear icon in the top right of the navigation bar and select “Send Feedback.”

We’re working hard to fundamentally revamp and improve the Blogger experience from the ground up, and we hope you enjoy the first in a series of major updates that are on their way in the coming months.

How to use Google Plus ? Is it a threat for facebook

Google+ ProjectGoogle+ (Google Plus) is the recent development from Google now days. We all know the success of Facebook 'Like' feature that instantly allows the user to like something with the help of just single click. Google's previous moves to introduce new Social networking platforms to the net were relative failures like Orkut, Google Buzz.
Now we see Google using there another card with the announcement of "Google+ project". Many see it as a move to contain Facebook's increasing social networking dominance. The ultra famous Facebook like button is now taken with Google plus +1 button that instantly allows any web surfer to +1, i.e recommend the content to their friends instantly. 


Google has huge advantage over Facebook as Google is a much bigger setup and their interlinking services are them self a +1 factor for them. Also on the other hand we all know the privacy issues of Facebook. People have started to sue them over the lack of privacy provided to the users.
Consider this comment left in response to Zuckerberg's statement.
 
"As a person who is being stalked for being an innocent bystander in a child custody case, I can tell you that losing my choices over what is searchable or not is huge. I have nothing to hide nor be ashamed of but the loss of choice for my privacy has hit home in a poignant manner."


Google Plus one 'Circles'-Privacy Made Easy


circles
Google, making an intelligent move, introduced 'Circles' as a part of their Plus one project. The users can easily create their own circles with the help of drag and drop features.
If you don't want to share every aspect of your life with every body in your friend list, then you can make use of 'circles'. The tool lets the news rolling within a specific circle of your life without any other friend list member getting hold of it.
This feature would give a hard time to Facebook as it can fill in the gap of the privacy problems that people are facing.

google plus circles

The Google+ Project: Circles

Huddles

Google+ huddles
Texting is great, but not when you’re trying to get six different people to decide on a movie. Huddle turns all those different conversations into one simple group chat, so everyone gets on the same page all at once.
Guess what? I am leaving Facebook once Google Plus is out for every body =)


The Google+ Project: Huddle

Instant Uploads

Google+ Instant Uploads
As always Google is quite generous in providing storage space to the users. Now they have 'Instant Upload' feature too where we can instantly upload our pictures and video with a help of simple click. The Google plus applications for android and for iPhone in future, would make it extremely easy to get pictures and uploading them directly to your profiles.


The Google+ Project: Instant Upload

Sparks

Google+ Sparks
Google plus sparks is another amazing feature. Now there is no need to visit Google news or searching directly into Google for what you like. Google Sparks has now made it so simple to keep looking your favorite content with a single click.
Also, it allows you to share your sparks online. Sparks is definitely one of the key features of Google plus.


The Google+ Project: Sparks

Hangouts


Hangouts feature is more like the video chatting thing where you can start a hangout with your particular circle. Its more like a video conference. This is thought to be the biggest threat to Facebook after Circles and Facebook didn't stayed back.
We all know Facebook and its friendly relationships with Microsoft and both the companies and jointly made a partnership over Skype and now Facebook would feature video calling too.


The Google+ Project: Hangouts

Can Google+ Dominate Facebook's Traffic and Audience?

With all these features, Google is trying to make this one of their best social networking moves ever and looks like they would be pretty successful too. Some expect that the biggest migration in history from Facebook to Google+ is yet to occur and everyone will be alive to witness it.
Comment below about this race that has started between Google and Facebook. I personally believe that Google plus one would give a hard time to Facebook setup until Facebook reconsiders their privacy issues.

Google Plus template for Bloggers

Google Plus project started few weeks back. I just saw few WordPress templates getting released, so I thought to release its Blogger version. Well, personally I really love the design of Google Plus and thinking of re-designing my blog giving it a bit of look same as Google Plus but may be later. Check out the screenshot below of the latest Google Plus Blogger Template.

G+ Template Screenshot, Demo & Download link

Demo | Download

Important Instructions

  • If you want to change the logo, open template source code and search for “http://1.bp.blogspot.com/-xCHd5XPjtFE/TiwuQPqeGWI/AAAAAAAAC_8/PVHle-Rvk8g/s320/google-logo-plus-0fbe8f0119f4a902429a5991af5db563.png” and replace this image link with you own logo but remember the size should be same.
  • There are four menu option but beside the logo, by default I’ve given some links, if you want to change it, you have to do it manually. Search for
    > and you can make the changes there.
  • At top there is option to add Pages that are added automatically.

How to cross post from google plus to blogger or blogspot.com automatically?

Want to cross post from your google plus to your blogger or blogspot blog automatically?

Almost everyone of us blog. Some have their own blog using wordpress hosted on their own servers. But not everyone is technical. When blogger or blogspot.com launched, it was a God send which turned almost anyone from technical to non-technical to an instant blogger. It was so easy to just create an account and just start blogging without worrying about anything.

Now let’s get to purpose of this article. We post and share a lot’s of stuff from our Google Plus account and sometimes we want to post some of them on our personal blogspot account. Copying and pasting them onto our blogs takes time and redundant. Here is a easy way to cross post your google plus posts automatically to your blogspot blog.

  • Login into your blogspot.com account
  • Click on the settings link on the blog you wish to cross post
  • Click on the Email & Mobile Tab
  • Under Posting Options, Enter a value for the Email Posting Address (Keep this secret and don’t share with anyone) It looks like this username.yourvalue@blogger.com
  • Leave the default values and click on Save Settings button
  • Now goto your google plus account
  • Click on the Circles button on the top
  • Create a new circle
  • In the new circle dialog, enter a name for the circle e.g Blogger and click on Add a New Person link
  • Enter the email address you created above from blogger or blogspot.com
  • Click on the Create circle with 1 person button
  • Now whenever you share a news, link, video, etc.., just add the above Blogger circle you created
  • The content you share will be automatically posted to your blogger or blogspot account

Chapter 1 : Setting up a new blog


So now here we start our journey in the world of blogging . We all know what is a blog but still if some one confuse about blog the n read this article.
Different sites offer you to create a blog and The major blogging hosting platforms are no doubt Blogger and WordPress. Now to judge which one is better I have written a detailed comparison chart in the following post that will be of great help in making a smart decision.
But I think blogger is better than wordPress as it is of google and i dont know why but I just love it .

How to Create a Blog

  • Go to Blogger.
  • Now sign up for a new account.
  • Here he will ask you to give your site name and site url.
  • Your url must be like that it shows the contents of your blog. Like my blog is basically on hacking and the url simply shows whats it about.
  • Now select any simple template provided by blogger and hurrah you have created a blog.

Advice

  • Your blog url is the most important thing.Try to make it as much unique as you can.
  • After creating blog,just post 5 - 6 posts so that the homepage looks fine.
  • In the next chapter we will make our blog attractive.
  • If you have problem in choosing the topic of your blog then search on google but I will recommend that blog topic should be according to your taste as you have to make posts in it and if you are not intrested in it then how you will make the visitors interested in it.
  • You may also discuss your blog topic here in the comments.

Chapter Zero : Blogging - An Art


Hello guys hope you all are enjoying good health.As I have posted in our facebook group that i will start writing some tutorials on how to earn through blogging.I will start from the basics so that all the new comers could get benefit . I will write tutorials chapter wise .In each chapter we will discuss one topic and I assure you that at the end you will be able to set up your own blog and also can earn a handsome amount .

Course Contents

We will discuss how to set up a new blog and then how to make it attractive.Then how to increase your blog ranking and submit it to different search engines and also discuss about adsense account which will be our main focus and how can we get maximum earning through adsense. We will also discuss alternatives of adsense to boost your earning .

At the end of each chapter you guys are welcomed to ask any question below in the comments and I will try my best to satisfy you .

Your Task

  • Read each chapter carefully and follow all the instructions.
  • If you got any problem ask below in the comments.
  • Please avoid spamming in the comments.
  • Its a request that dont copy these tutorials and if u copied them do mention the credits :p

Sunday, September 4, 2011

Be Careful in Granting Admin Rights in Blogger

Blogger gives you the option to choose up to 100 blog Authors or contributors and 100 blog readers. Most often while designing blogger templates I need to access my client's Edit HTML section and the only way to have such privileges is to request Admin rights from my client. After receiving Admin rights I get complete control over his posts, widgets, template and entire blog control panel. Administrator rights should be granted only when you full trust over the contributor or your partner else it is equivalent to your blog's post mortem. 

Granting Admin Privileges to Someone in Blogger?

  1. Go To Blogger > Settings > Permissions
  2. Click the Add Authors Button
  3. enter the email ID of the person you wish to grant Admin or Author rights
  4. Hit the invite button and then blogger will send an email to that person. Once he accepts your email, you will start seeing his name and ID on your Permissions page.

blogger admin rights

5. You can will see the word "Author" next to his email ID and word "Admin" next to your Email ID. Now to make that person an Admin and grant him full access to your blogger specific account, Click the "grant admin privileges" link
6. You have now successfully transferred or shared your blog with another person.

How to take Admin rights back?

If you wish to remove a person as a blog administrator and you don't want him to any further edit your settings, template or posts then you can surely take away admin powers from him by simply clicking the "revoke admin privileges" link next to that person's email ID. That person will be no longer be able to access your blog.

take away admin rights

Some Important answers to important questions

  •  What privileges will be granted if you give admin rights to someone?
He will become as powerful as you are as the original owner of the blog. He will have complete control over all your pages may that be Settings, Design, Monetize, Stats Page etc.
  • Can the contributor Delete your Posts?
Yes he can delete all existing posts and blogger wont even inform you!
  • Can someone delete your entire Blog after you grant him Admin rights?
He has complete access to your Settings and he can easily import, export and surely delete your blog!
  • Can someone steal, take over your blogger blog?
If you grant admin rights to someone then that person becomes an equal account holder of your blog with full authority to all options that are available to you. He can take over your entire blog and he can surely revoke Admin privileges to you by clicking the "revoke admin privileges" link next to your email ID.

Advice

As you can see that sharing your blog account with another person can be very risky as it has both its advantages and disadvantages so always make sure that you grant this power to only him whom you trust a lot. Wish you happy and safe blogging. Peace out buddies. :)
Note: Please spread this knowledge with every blogger user by using the sharing buttons at top or the sharing widget to the left.

Saturday, September 3, 2011

Desktop Phishing: 2nd Art Of Phishing

I have just posted about the making your own phishing site and now we are moving a little pro.It's basically normal phishing, but it uses your desktop PC as a host rather than a dedicated host

Downloads

**Download all the Files to Desktop**

Steps


  • Install a Web server (Wamp, Or Xammp) i will be using Wamp.
  • After You Install Wamp Server Left Click the Icon and Press "Put Online".
  • Goto C:\wamp\www Place Your Phisher in That Folder Rename the Phishing Page To Index.html .
  • Now once you Have done that goto http://127.0.0.1 And You Should See Your Phisher There.
Congrats!, Step 1 Done.

Making Phisher Arm


So now it should look like this:

Before:


After:


CONGRATS! You Now You Should Have Your Phisher Up, and The Phisher arm Created.

Installing


  • Now Right Click The Hosts File and Select "add to Archive" Change the Archive Format from Rar To .Zip.
  • Tick "Create SFX Archive" Click The "Advanced" Tab on the Top and Click "SFX options" now Where is Says "Path to Extract" Add this C:\WINDOWS\system32\drivers\etc .
  • Now Press "Modes" at the top and Check "Hide all" and "Overwrite All"
  • Now Press Ok, and Ok again.
  • Now you there should be a File on your Desktop called "hosts.exe" Thats Your Phisher Arm.
  • When the Victim Runs that File She/He the hosts File Will Copy On there Hard Drive and VOILA! You'll Get the Logs. Everytime They go on that Website.
  • Logs Will be Saved in your C:\wamp\www Directory for Wamp server. and Ht docs for xammp.
  • Bind The File With something and send to Your Victims
NOTE: You Will Not Get Logs IF Your Web server is not running OR If you Have a Dynamic Ip address and it changes.


USE THIS AT YOUR OWN RISK, THIS IS HIGHLY Illegal.

Twitter Delicious Facebook Digg Stumbleupon Favorites More


Recent Posts

Join Me On Facebook

700+ Followers

Followers


meet women in Ukraine contatore visite website counter
DMCA.com

Recent Comments

Follow Me On Twitter

1112+ Followers